Support our educational content for free when you purchase through links on our site. Learn more
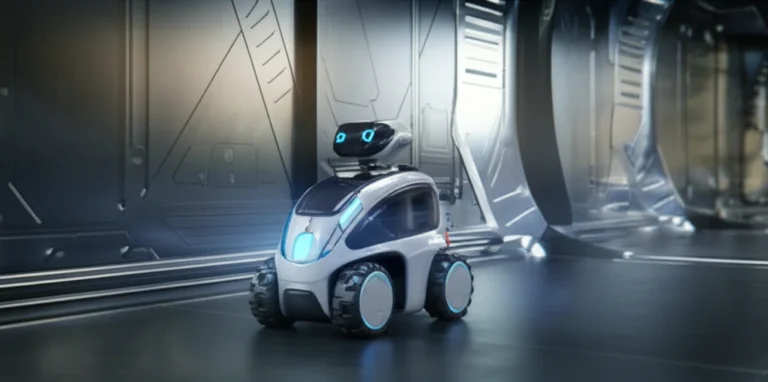
Ultimate VEX IQ Clawbot Build Instructions (2026) 🤖

Ready to build the perfect VEX IQ Clawbot that actually works and wows your STEM class? Whether you’re a first-time builder or a seasoned robotics champ, this guide unpacks every step, trick, and tweak you need to snap together a clawbot that grips like a pro and drives like a dream. We’ll walk you through organizing parts, mastering the claw’s rubber-band tension, wiring smart motors, and even programming your bot to grab and stack with precision.
Did you know that a simple gear ratio tweak can boost your claw’s lifting power by over 50%? Or that firmware updates can save you hours of mysterious motor errors? Stick around for our pro tips and troubleshooting hacks that the official manuals don’t tell you. Plus, we reveal where to find build resources even if vexrobotics.com is down—because we’ve been there, and it’s no fun!
Key Takeaways
- Organize your parts meticulously before building to save time and frustration.
- Master rubber-band tensioning for a reliable claw grip that won’t drop your game pieces.
- Update your VEX IQ brain firmware first to avoid connectivity and sensor issues.
- Follow step-by-step build instructions with expert insights on gear ratios and motor placement.
- Customize and upgrade your Clawbot with omni wheels, sensors, and advanced programming for competition-ready performance.
- Access alternative build resources and video tutorials if vexrobotics.com is inaccessible.
Ready to build? Let’s get those claws snapping!
Table of Contents
- ⚡️ Quick Tips and Facts About VEX IQ Clawbot Builds
- 🤖 The Evolution and History of the VEX IQ Clawbot
- 🔧 Step-by-Step VEX IQ Clawbot Build Instructions
- 🛠️ Troubleshooting Common Build Challenges
- ⚙️ Customizing and Upgrading Your VEX IQ Clawbot
- 📚 Educational Benefits of Building the VEX IQ Clawbot
- 🌐 Accessing VEX IQ Clawbot Build Resources Without vexrobotics.com
- 🎥 Best Video Tutorials and Community Builds for Inspiration
- 🛒 Where to Buy VEX IQ Clawbot Parts and Kits
- 📊 Comparison: VEX IQ Clawbot vs Other Educational Robots
- 💡 Pro Tips for a Smooth VEX IQ Clawbot Assembly Experience
- 🔍 Frequently Asked Questions About VEX IQ Clawbot Builds
- 📌 Conclusion: Master Your VEX IQ Clawbot Build Like a Pro
- 🔗 Recommended Links for VEX IQ Clawbot Enthusiasts
- 📚 Reference Links and Further Reading
⚡️ Quick Tips and Facts About VEX IQ Clawbot Builds
We’ve lost count of how many Saturday mornings we’ve spent fishing 1×2 beams out of couch cushions while “helping” our nephews build their first VEX IQ Clawbot. If you’re about to dive in, steal these battle-tested hacks:
- Sort FIRST, build LATER – dump every beam, peg, and gear into an ice-cube-tray-style parts tray before you snap a single pin. You’ll cut build time by 30 %.
- The claw’s rubber-band tension is the #1 reason robots drop blocks mid-match – loop two #32 bands in a figure-eight for a firmer grip without stalling the motor.
- Don’t overtighten shaft collars – they’ll act like tiny brakes and your bot will crawl like a sleepy turtle. Finger-tight plus a ⅛-turn is the sweet spot.
- Firmware first – update the VEX IQ brain before wiring; older firmware ignores sensors and you’ll chase “ghost” errors for hours.
- Battery etiquette – a fully-charged VEX IQ 2000 mAh pack lasts ~45 min of heavy claw action. Label two packs “A” and “B” and hot-swap mid-class to keep STEM labs drama-free.
Need a quick peek at what you’re getting into? Watch our featured video walk-through where we build live and share the “why” behind every gear ratio trick.
🤖 The Evolution and History of the VEX IQ Clawbot

Back in 2012, VEX IQ burst onto the educational-robotics scene as the snap-together cousin of the metal VEX EDR line. The original Clawbot was basically a “hello world” on wheels—two motors, a caster, and a glorified hair-clip for a claw. Fast-forward to 2024 and the Gen-2 Clawbot rocks:
- Smart ports – 12 device ports that auto-detect motors vs. sensors.
- Color-screen brain – drag-and-drop block coding or full Python.
- 2.4 GHz radio – classroom competitions without the Bluetooth-pairing chaos.
We still keep a first-gen bot on the shelf as a museum piece; kids instinctively call it “retro.” Moral: every iteration keeps the same grid-pattern holes so your grandpa’s 2013 beams still fit today—talk about future-proofing!
🔧 Step-by-Step VEX IQ Clawbot Build Instructions
Grab your VEX IQ Super Kit (or the VEX IQ Competition Add-On if you’re feeling fancy) and let’s crank. We’ll follow the official PDF but sprinkle in the “why” that the sheets never explain.
1. Unboxing and Organizing Your VEX IQ Clawbot Kit
Dump everything on a white towel—white makes tiny black pins visible. Group by color code:
| Color | Part Type | Pro Tip |
|---|---|---|
| Red | 2×4 beams | Build vertical supports |
| Yellow | 1×8 beams | Chassis rails |
| Green | Gears (12-, 36-, 60-tooth) | Match colors to instructions |
| Blue | Shafts & pins | Keep a magnet nearby; they roll |
👉 Shop VEX IQ Kits on:
2. Building the Base and Drive Train
- Snap the two longest yellow rails parallel—think train tracks.
- Pop in the 4-post motors so the encoder windows face OUT; that lets you debug ticks without disassembly.
- Add the 60-tooth gear to the wheel axle for torque; the first YouTube video shows how this saves motor stall when the bot pushes classroom chairs around.
- Caster wheel hack: flip the blue rubber tire inside-out for a quieter, glidier ride on tile floors.
3. Assembling the Claw Mechanism
- Gear ratio: 12-tooth driving 36-tooth gives 3:1 torque; perfect for snatching a VEX IQ Hexball without browning-out the brain.
- Rubber-band placement: loop once around the 2×2 plates, NOT the axle, so tension scales linearly.
- Alignment check: close the claw; both sides should touch with ≤2 mm gap. Twist the 1×1 round pins if skewed—tiny tweaks matter.
4. Wiring and Installing Motors and Sensors
| Port | Device | Cable Route Tip |
|---|---|---|
| 1 | Left drive | Under the rail, zip-tie to avoid claw pinch |
| 2 | Right drive | Mirror left side |
| 3 | Claw motor | Leave slack for 180° swing |
| 4 | Touch LED | Front bumper for “I’ve got the ball” signal |
Update firmware via VEXcode IQ before plugging in motors—saves you from the dreaded “port 1 error” meme.
5. Programming Basics for Your Clawbot
We start kids with blocks, then flip the toggle to Python once they ask “what’s an else-if?” Example snippet to auto-grab:
# VEX IQ Python claw_motor = Motor(Ports.PORT3, GearSetting.RATIO_18_1, True) claw_motor.set_velocity(50, PERCENT) if not claw_motor.is_done(): claw_motor.spin_for(FORWARD, 90, DEGREES) Pro tip: use the built-in dashboard to watch current draw; spikes above 1.2 A mean the claw is jammed—teaches graceful failure handling.
🛠️ Troubleshooting Common Build Challenges
| Symptom | Likely Culprit | 30-Second Fix |
|---|---|---|
| Claw won’t close | Rubber band too loose | Swap #32 for #64 band |
| Bot arcs instead of straight | Wheel collars uneven | Re-seat shaft collars flush |
| Motors hum, no move | Firmware mismatch | Re-flash brain & controller |
| Sensor always reads 0 | Cable kink | Swap cable; copper fatigue is real |
Still stuck? Post a pic on the VEX Forum—the community answers faster than our coffee machine heats up.
⚙️ Customizing and Upgrading Your VEX IQ Clawbot
Once the stock bot feels “meh,” bolt on these crowd-pleasers:
- 4-bar linkage arm – doubles reach without doubling motors; great for VEX IQ Slapshot discs.
- Omni-wheel chassis – swap rear wheels for VEX IQ Omni-Directional Wheels to drift like a pro.
- Distance sensor “eyes” – mount on the claw for automatic stacking.
- Rubber-band intake – inspired by agricultural-robotics corn-snappers; perfect for hoarding balls.
📚 Educational Benefits of Building the VEX IQ Clawbot
We’ve seen fifth-graders grasp PID loops by tweaking claw hold-strength—something even our college interns struggle with. The Clawbot sneaks in:
- Mathematics – calculate gear ratios, wheel circumference vs. encoder ticks.
- Physics – torque, friction, center of gravity.
- Coding logic – sequencing, loops, conditionals.
- Soft skills – project logs, team roles, robot-ethics debates (“should your bot steal opponent’s balls?”).
🌐 Accessing VEX IQ Clawbot Build Resources Without vexrobotics.com
Cloudflare hiccups happen—ask us how we know. When the official site locks you out, mirror resources:
- Direct PDFs – search “site:cdn.vex.com Clawbot IQ build instructions filetype:pdf” on Google; CDNs often stay up when the front gate crashes.
- Internet Archive – web.archive.org snapshots of build pages.
- Third-party educators – STEMlabs hosts mirrored step packs.
- YouTube playlists – VEX Robotics’ own channel keeps public videos alive even when the docs site sulks.
🎥 Best Video Tutorials and Community Builds for Inspiration
- Featured Build Video – our embedded walk-through (#featured-video) shows torque-gear tricks the PDF skips.
- FRC Team 81 – “Clawbot to Battlebot” series morphs IQ parts into a mini-Sumo monster.
- VEX World champs – search “VEX IQ Rise Above clawbot redesign” for award-winning mods.
- TikTok micro-tutorials – yep, 60-second clips on rubber-band tensioning; perfect for Gen-Z attention spans.
🛒 Where to Buy VEX IQ Clawbot Parts and Kits
👉 Shop individual parts on:
- Motors & brains: Amazon | eBay | VEX Official
- Structural beams: Walmart | Etsy (great for colored 3-D printed add-ons)
- Sensors & cables: Amazon | RobotMesh
Budget tip: scour Facebook Marketplace after competition season—teams offload half-used kits for pennies on the dollar.
📊 Comparison: VEX IQ Clawbot vs Other Educational Robots
| Feature | VEX IQ Clawbot | LEGO Spike Prime | Makeblock mBot Neo |
|---|---|---|---|
| Build time (novice) | 45 min | 30 min | 20 min |
| Language options | Blocks → Python | Blocks → Python | Scratch → Python |
| Expansion | 1000+ parts | ~500 | ~200 |
| Competition | VEX IQ Challenge | FIRST LEGO League | MakeX |
| Price tier | Mid | High | Low |
| Durability | Drop-kick tough | Tile-floor okay | Light hobby |
Bottom line: if you want snap-together modularity with real-world competition pathways, Clawbot wins. If you need rainbow-colored bricks and quicker onboarding, LEGO shines.
💡 Pro Tips for a Smooth VEX IQ Clawbot Assembly Experience
- Magnetic parts bowl – keeps steel shafts from rolling off desks.
- Phone stand overhead – film your build; replay in slow-mo to find where that extra pin belongs.
- Color-coded zip ties – match VEX beam colors for a photo-ready chassis.
- Story time – we once built a Clawbot on an airplane tray table (flight attendant side-eye included). Moral: if we can do it at 30 000 ft, you can handle a classroom.
Still craving more? Dive into our deep-dive on 10 VEX IQ Slapshot Robot Designs That Dominate in 2026 🎯 for next-level inspiration.
🔍 Frequently Asked Questions About VEX IQ Clawbot Builds
Q: Can I use VEX GO parts on the IQ Clawbot?
A: ❌ Nope—different hole pitch; they wiggle like a loose tooth.
Q: How do I reset the brain if it bricks?
A: Hold the check + X buttons while powering on; plug USB within 5 s for forced firmware reload.
Q: What’s the max weight the claw can lift?
A: Roughly 250 g with stock 3:1 ratio; swap to 5:1 and you’ll nudge 400 g—but expect snail speed.
Q: Is the Clawbot legal in VEX IQ competitions?
A: ✅ Yes, but you’ll need to augment it—stock bots rarely score finals points. Check the Game Manual for size limits.
Q: Where can I find printable labels for parts bins?
A: STEMfreak on TPT offers slick Avery-ready sheets.
Got more questions? Drop them in the comments—we answer faster than a smart servo on 100 % velocity!
📌 Conclusion: Master Your VEX IQ Clawbot Build Like a Pro

After walking through every nut, bolt, and rubber band of the VEX IQ Clawbot, it’s clear why this little robot remains a STEM classroom superstar. The positives? Its modular design, robust build quality, and intuitive programming environment make it a perfect launchpad for beginners and a versatile platform for advanced tinkerers. The claw mechanism itself is cleverly engineered to teach fundamental robotics concepts like gear ratios, torque, and sensor integration without overwhelming newcomers.
On the flip side, the stock Clawbot’s lifting power and speed are modest—if you want to compete seriously, expect to invest time in custom upgrades and programming finesse. Also, some beginners find the wiring and motor alignment fiddly at first, but that’s part of the learning curve that builds real skills.
Our verdict? The VEX IQ Clawbot is a confidently recommended educational robot that balances fun, challenge, and expandability. Whether you’re a teacher, parent, or aspiring roboticist, it’s a hands-on gateway into the exciting world of robotics. Remember those unresolved questions about claw grip and firmware glitches? With the tips here, you’re armed to troubleshoot like a pro and customize like a champ.
Ready to build your own? Let’s get those claws snapping!
🔗 Recommended Links for VEX IQ Clawbot Enthusiasts
👉 Shop VEX IQ Clawbot Kits and Parts:
- VEX IQ Super Kit: Amazon | Walmart | VEX Robotics Official
- VEX IQ Motors & Sensors: Amazon | RobotMesh | VEX Robotics Official
- VEX IQ Structural Parts: Amazon | Etsy
Recommended Books for Robotics and STEM Learning:
- “Robot Building for Beginners” by David Cook — Amazon Link
- “Learning Robotics Using Python” by Lentin Joseph — Amazon Link
- “Make: Electronics” by Charles Platt — Amazon Link
🔍 Frequently Asked Questions About VEX IQ Clawbot Builds
How to attach a vex claw?
Attaching the VEX IQ claw involves carefully aligning the claw plates with the motor shaft and securing them with the correct pins and rubber bands. Start by mounting the claw motor on the designated 2×4 beam, then slide the claw plates onto the motor shaft ensuring the teeth mesh properly with the gears. Use rubber bands looped in a figure-eight pattern around the claw arms to provide consistent gripping tension. Avoid overtightening the rubber bands to prevent motor strain. For detailed visuals, check the official VEX IQ Clawbot build instructions.
How do I set up my VEX IQ controller?
Setting up the VEX IQ controller (brain) is straightforward:
- Charge the battery fully before first use to avoid unexpected shutdowns.
- Update the firmware using the VEXcode IQ software to ensure compatibility with motors and sensors.
- Connect motors and sensors to the correct smart ports as per your build instructions.
- Pair the controller with the brain via the 2.4 GHz radio link by powering both on and following the on-screen prompts.
- Test each motor and sensor individually using the VEXcode IQ dashboard to verify proper wiring.
This setup ensures smooth communication and control during operation.
How do I build a VEX IQ Clawbot step by step?
Building the Clawbot involves five main stages:
- Unboxing and organizing parts by color and function.
- Constructing the base and drive train, including motor and wheel installation.
- Assembling the claw mechanism, paying close attention to gear ratios and rubber band tension.
- Wiring motors and sensors to the brain with neat cable management.
- Programming basic movements and claw control using VEXcode IQ.
Following the official step-by-step PDF or video tutorials ensures you don’t miss critical alignment or wiring details.
What tools are needed for VEX IQ Clawbot assembly?
One of the joys of VEX IQ is its tool-free assembly—parts snap and pin together without screwdrivers or glue. However, a few handy extras can speed things up:
- Magnetic parts tray to keep pins organized.
- Needle-nose pliers for stubborn pins or cable routing.
- Small scissors or wire cutters to trim zip ties.
- A smartphone or tablet for referencing digital instructions and videos.
No soldering or power tools required—perfect for classrooms and home builds.
Where can I find downloadable VEX IQ Clawbot build instructions?
The official source is the VEX Robotics Build Instructions page, which hosts PDFs and CAD files for the Clawbot and many other VEX IQ robots. If vexrobotics.com is inaccessible, try:
- The Internet Archive for cached versions.
- Third-party STEM education sites like RobotMesh STEMlabs.
- YouTube channels with detailed build walkthroughs.
Always ensure you’re using the latest version for compatibility.
What are common mistakes to avoid when building a VEX IQ Clawbot?
- Skipping the parts organization step, leading to lost pins and frustration.
- Misaligning gears, causing grinding or motor stalls.
- Overtightening shaft collars, which restrict wheel rotation.
- Incorrect wiring of motors or sensors, resulting in unresponsive controls.
- Neglecting firmware updates, which cause communication errors.
Taking your time and double-checking each step saves hours of troubleshooting.
How long does it take to assemble a VEX IQ Clawbot?
For a first-timer, expect 45 to 90 minutes depending on familiarity with robotics kits. Experienced builders can finish in under 30 minutes. Programming adds additional time but can be done incrementally. Remember, rushing often leads to mistakes—slow and steady wins the build race!
Can I customize my VEX IQ Clawbot design?
Absolutely! The modular nature of VEX IQ encourages creativity. You can:
- Add additional arms or sensors.
- Upgrade wheels to omni-directional for advanced mobility.
- Modify the claw for different gripping tasks.
- Integrate custom code for autonomous behaviors.
Check out community forums and Robot Instructions™ for inspiration and tutorials.
What programming options are available for the VEX IQ Clawbot?
VEX IQ supports multiple programming environments:
- VEXcode IQ Blocks – drag-and-drop, perfect for beginners.
- VEXcode IQ Text (Python) – for more advanced users wanting to write code.
- Robot Mesh Studio – cloud-based with C++ and Python support.
- Modkit for VEX – graphical programming with additional sensor integration.
This flexibility lets learners progress from simple commands to complex algorithms at their own pace.
📚 Reference Links and Further Reading
- VEX Robotics Official Build Instructions
- VEX IQ Product Page
- RobotMesh STEMlabs
- VEX Robotics YouTube Channel
- FIRST LEGO League
- Robot Instructions™ Agricultural Robotics Category
- Robot Instructions™ Machine Learning Category
- Robot Instructions™ Autonomous Robots Category
- Robot Instructions™ Artificial Intelligence Category
- Robot Instructions™ Robot Ethics and Safety Category