Support our educational content for free when you purchase through links on our site. Learn more
How to Make a Robot Step-by-Step with Pictures [2023]

Are you ready to embark on an exciting journey of building your own robot? In this comprehensive guide, our team at Robot Instructions™ will provide you with a step-by-step tutorial on how to make a robot from scratch. We'll walk you through each stage of the process, complete with detailed instructions and helpful pictures. So grab your tools and let's get started on this thrilling DIY adventure!
Table of Contents
- Quick Answer
- Quick Tips and Facts
- Introduction: How to Build a Robot From Scratch
- Step 1: Watch the Video
- Step 2: Create the Sketch
- Step 3: Create the 3D Models
- Step 4: Manufacture the 3D Parts
- Step 5: Order the Electronic Components
- Step 6: Assemble Everything Together
- Step 7: Upload the Code
- Step 8: Congratulations!
- Be the First to Share
- Recommendations
- FAQ
- Conclusion
- Useful Links
- Reference Links
Quick Answer
To make a robot step-by-step with pictures, follow these key steps:
- Watch instructional videos to gain a better understanding of the process.
- Create a detailed sketch of your robot design.
- Use computer software to create 3D models of your robot.
- Manufacture the 3D parts using a 3D printer or other fabrication techniques.
- Order the necessary electronic components for your robot.
- Assemble all the parts together, ensuring proper connections.
- Upload the required code to program your robot.
- Congratulate yourself on building your very own robot!
Quick Tips and Facts
- Building a robot requires basic knowledge of electronics, coding, and mechanical assembly.
- It's important to have a clear design plan before starting the build process.
- Learning from instructional videos and online tutorials can greatly enhance your understanding.
- Start with a simple robot design for your first build and gradually progress to more complex projects.
- Have fun and experiment with different features and functionalities for your robot.
Introduction: How to Build a Robot From Scratch

Building a robot from scratch is an incredibly rewarding experience that combines creativity, problem-solving, and technical skills. By following these step-by-step instructions, you'll be able to make your own robot and customize it to fit your specific needs and interests.
Step 1: Watch the Video
Before diving into the construction process, it's beneficial to watch instructional videos from experienced robot builders. These videos provide valuable insights, tips, and tricks that can enhance your learning experience. Choose videos that align with your skill level and the type of robot you want to build. This will give you a better understanding of the different components, assembly techniques, and programming requirements. Remember to take notes and bookmark helpful videos for future reference.
Check out this YouTube playlist of robot building tutorials for beginners.
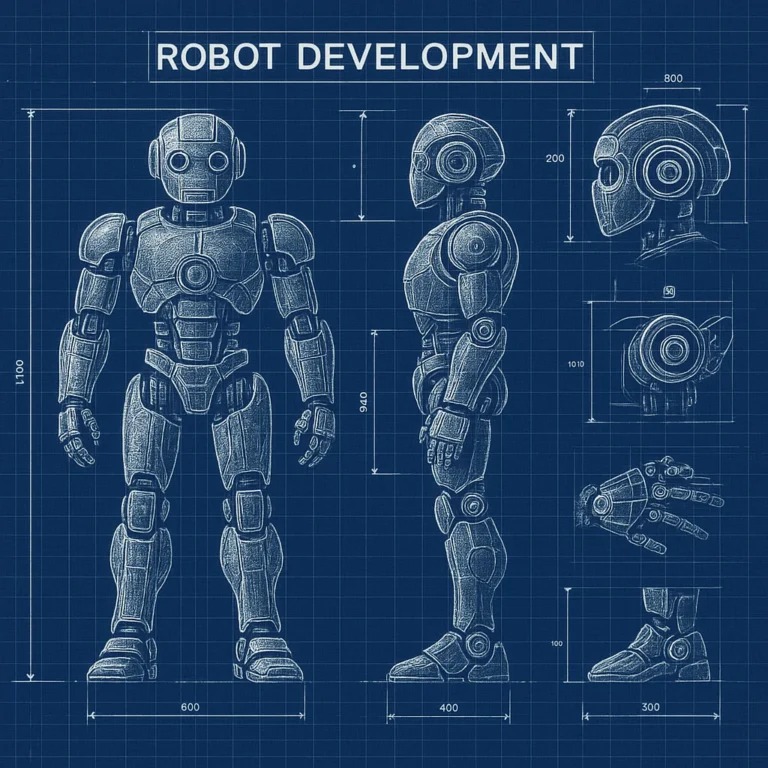
Step 2: Create the Sketch
To bring your robot to life, start by creating a detailed sketch of your design. This will serve as a blueprint for your build and allow you to visualize the different components and their placements. Your sketch should include dimensions, component locations, and any specific features you want to incorporate. Be creative and let your imagination run wild.
Step 3: Create the 3D Models
Once you have a solid sketch, it's time to create 3D models of the different parts of your robot. You can use computer-aided design (CAD) software to design and model each component. CAD software offers precise measurements, allowing for accurate fabrication and assembly. Pay attention to the design details and ensure all components fit together seamlessly.
Step 4: Manufacture the 3D Parts
With your 3D models finalized, you can now manufacture the actual parts using a 3D printer or other fabrication techniques. If you don't have access to a 3D printer, consider utilizing 3D printing services provided by local makerspaces or online platforms. Ensure you choose the appropriate material for each part, taking into consideration factors such as strength, durability, and cost. Double-check the dimensions and print settings to avoid any discrepancies.
Step 5: Order the Electronic Components
The next step in the process is to order the necessary electronic components for your robot. This includes microcontrollers, motor drivers, sensors, actuators, batteries, and any other components specific to your design. Be sure to research different suppliers and compare prices to ensure you're getting the best quality components within your budget. Check out the following links to shop for electronic components on Amazon:
- Shop microcontrollers on Amazon
- Shop motor drivers on Amazon
- Shop sensors on Amazon
- Shop actuators on Amazon
- Shop batteries on Amazon
Step 6: Assemble Everything Together
Now comes the exciting part—bringing all the components together to assemble your robot. Utilize your sketch and 3D models as a guide during the assembly process. Make sure to follow proper wiring techniques, secure connections, and provide sufficient protection for sensitive components. Refer to the video tutorials you watched earlier and double-check your connections to avoid any mishaps.
Step 7: Upload the Code
Your robot is almost complete, but it needs a brain to function. This is where coding comes into play. Use an appropriate programming language (such as Arduino or Python) to write the code that will control your robot's behavior. You can find pre-written code online or develop your own based on your desired functionalities. Take your time to understand the code and make any necessary modifications to suit your robot.
Step 8: Congratulations!
Congratulations, you've successfully built your own robot from scratch! Now it's time to power it up and watch it come to life. Test different functionalities, make adjustments as needed, and enjoy the fruits of your labor. Remember, building a robot is a continuous learning process, so don't hesitate to experiment, explore new technologies, and push the boundaries of your creativity.
Be the First to Share
We would love to see your robot creations! Share pictures and videos of your robots on social media using the hashtag #DIYRobot. Inspire others with your creativity and showcase the amazing things you've accomplished. Who knows, your robot could become the next viral sensation!
Recommendations
If you're just starting out and looking for beginner-friendly robot kits, we recommend checking out the following options:
Now that you've learned how to make a robot step-by-step with pictures, it's time to unleash your creativity and bring your own unique robot ideas to life. Remember to have fun throughout the process and never stop learning!
FAQ

Q: How to make a robot for a school project easy step by step?
A: Making a robot for a school project can be a fun and educational experience. Here are some steps to guide you:
- Research: Start by exploring different types of robots and select a project idea that aligns with your interests and school requirements.
- Design: Create a sketch of your robot, taking into consideration its purpose, features, and dimensions.
- Gather Materials: Make a list of the required materials and components for your robot. You can order them online or visit local electronics stores.
- Build: Follow the step-by-step instructions provided in this article to assemble the robot using your sketch as a guide.
- Program: Write the necessary code to control your robot's movements and functionalities. Refer to online tutorials and guides for coding help.
- Test and Refine: Test your robot to ensure it functions properly. Make any necessary adjustments or improvements based on the results.
Q: What are the steps to making a robot?
A: The steps to making a robot include:
- Understanding the Basics: Learn about electronics, coding, and mechanical assembly.
- Design: Create a sketch or blueprint of your robot's design.
- Procuring Materials: Gather all the necessary components and materials.
- Building: Assemble the robot, following the design and assembly instructions.
- Programming: Write the code to control your robot's movements and behaviors.
- Testing: Test your robot's functionality and make any necessary adjustments.
- Refinement: Improve upon your design and troubleshoot any issues that arise.
- Enjoy: Celebrate your accomplishment and have fun with your robot!
Q: What do I need to make a simple robot?
A: To make a simple robot, you will need the following basic components:
- Microcontroller: Arduino or Raspberry Pi are popular choices.
- Motor: DC motors or servos for movement.
- Power Source: Battery pack or power supply.
- Sensors: Such as ultrasonic, infrared, or light sensors.
- Actuators: Like LEDs, buzzers, or switches.
- Chassis: A body or frame to hold everything together.
- Breadboard or PCB: To build the electrical connections.
- Jumper Wires: For connecting components.
- Screws and Standoffs: To secure the components to the chassis.
Additionally, you will need basic tools such as screwdrivers, wire strippers, and a soldering iron.
Q: What is the simplest robot to make at home?
A: The simplest robot to make at home is often a two-wheeled robot that moves forward, backward, and turns. This type of robot typically uses a microcontroller for control, two DC motors for movement, and a power source such as batteries. By following the steps outlined in this article and using beginner-friendly kits or components, you can easily make a simple robot at home.
Conclusion
Building a robot from scratch is a fascinating journey that combines creativity, problem-solving, and technical skills. By following our step-by-step guide, you can embark on this DIY adventure and make your own robot step-by-step with pictures. Remember to have fun, stay curious, and continue exploring the world of robotics.
Now, go forth and build your own robot masterpiece!
Useful Links

- Shop microcontrollers on Amazon
- Shop motor drivers on Amazon
- Shop sensors on Amazon
- Shop actuators on Amazon
- Shop batteries on Amazon
- Arduino Starter Kit
- LEGO Mindstorms EV3
Check out more exciting robot building tutorials and resources on the Robot Instructions™ website.
Reference Links