Support our educational content for free when you purchase through links on our site. Learn more
How to Make a Simple Robot [2023]

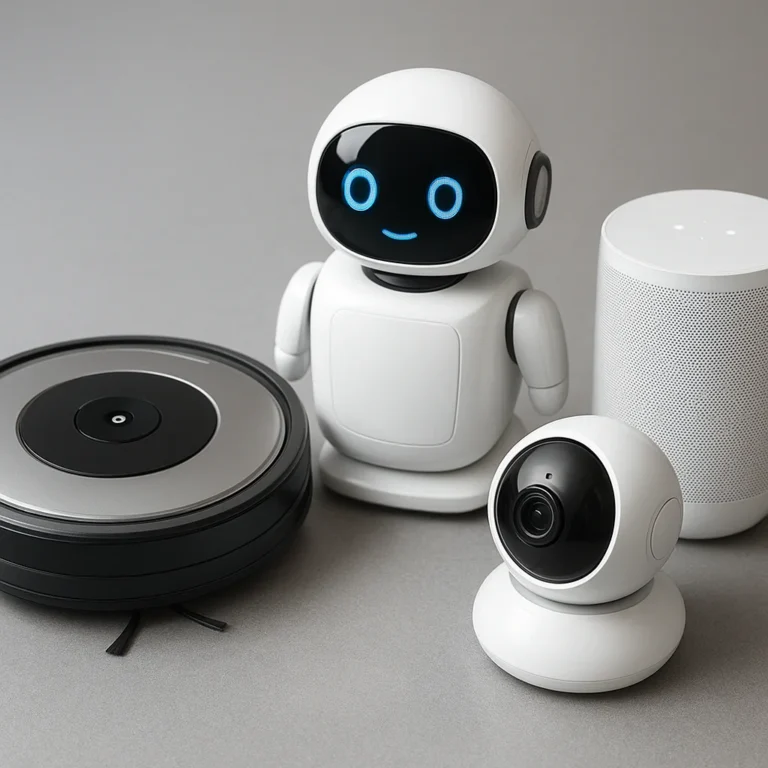
Have you ever wondered how to make a simple robot? Whether you’re a beginner or an experienced robotics enthusiast, building your own robot can be a fun and rewarding experience. In this article, we will guide you through the process of creating a simple robot from scratch. We’ll cover everything from the basic materials you’ll need to the step-by-step instructions for assembling your robot. So let’s get started!
Table of Contents
- Quick Answer
- Quick Tips and Facts
- Background
- 1. The “Bristlebot”
- 2. A Rolling Robot
- 3. A Rowing-Boat Robot
- 4. mBot: a STEM Coding Robot
- 5. Robot Kits for Beginners
- 6. Robot Building with Household Items
- 7. Paper Robots
- 8. Robot Programming
- FAQ
- Conclusion
- Recommended Links
- Reference Links
Quick Answer
Building a simple robot can be a fun and educational project. There are several ways to make a simple robot, ranging from using household items to assembling robot kits. Here are some popular options:
-
The “Bristlebot”: A simple robot made using a toothbrush, a small pre-isolated motor, and coin cell batteries. It’s a great project for beginners and can be built in just a few minutes. CHECK PRICE on: Amazon | Walmart | eBay | Etsy
-
A Rolling Robot: This robot requires more materials and effort, but it’s a great way to learn about mechanics and engineering. You’ll need a motor, wheels, and a chassis to build this robot.
-
A Rowing-Boat Robot: If you’re looking for a robot that can move on water, this is a great option. It’s made out of a DC motor and two batteries, and it can float and move on water. CHECK PRICE on: Amazon | Walmart | eBay | Etsy
-
mBot: a STEM Coding Robot: If you’re interested in coding and robotics, the mBot is a great option. It’s a STEM education robot that offers great flexibility in shapes and compatibility with LEGO bricks. It’s supported by the Makeblock App for controlling and programming. CHECK PRICE on: Amazon | Walmart | eBay | Etsy
These are just a few examples of simple robots you can make. The choice depends on your interests and the level of complexity you’re comfortable with.
Quick Tips and Facts
Before we dive into the details of building a simple robot, here are some quick tips and facts to keep in mind:
-
Start with a simple project: If you’re new to robotics, it’s best to start with a simple project that doesn’t require advanced skills or expensive materials. This will help you build confidence and learn the basics.
-
Gather the necessary materials: Depending on the type of robot you want to build, you’ll need different materials. Make sure to gather all the necessary components before you start the project.
-
Follow step-by-step instructions: Whether you’re using a kit or building from scratch, it’s important to follow step-by-step instructions carefully. This will ensure that your robot is built correctly and functions as intended.
-
Experiment and iterate: Building robots is a creative process, so don’t be afraid to experiment and iterate. If something doesn’t work as expected, try to identify the problem and find a solution. This will help you learn and improve your skills.
-
Have fun: Building a robot should be a fun and enjoyable experience. Don’t get discouraged if things don’t go as planned. Embrace the challenges and enjoy the process of creating something unique.
Background
Robots have fascinated humans for centuries. From the early automatons to the advanced humanoid robots of today, the field of robotics has come a long way. Building a simple robot is a great way to explore the world of robotics and learn about engineering, electronics, and programming.
The history of robotics dates back to ancient times, with early examples of mechanical devices that were designed to perform specific tasks. Over the years, advancements in technology have made it possible to create robots that can perform complex tasks autonomously.
Today, robots are used in various industries, including manufacturing, healthcare, agriculture, and even in our homes. They can perform repetitive tasks, assist in surgeries, explore hazardous environments, and much more. Building a simple robot at home can give you a glimpse into this fascinating world and inspire you to pursue further studies or careers in robotics.
1. The “Bristlebot”
The “Bristlebot” is a simple and fun robot that can be built using a toothbrush, a small pre-isolated motor, and coin cell batteries. It’s a great project for beginners and can be completed in just a few minutes. Here’s how you can make your own Bristlebot:
Materials:
- Toothbrush
- Small pre-isolated motor
- Coin cell batteries
- Double-sided tape
- Craft materials for decoration (optional)
Instructions:
- Remove the bristles from the toothbrush, leaving only the head.
- Attach the small pre-isolated motor to the head of the toothbrush using double-sided tape.
- Connect the motor to the coin cell batteries. Make sure the positive and negative terminals are properly connected.
- Turn on the motor and watch your Bristlebot come to life!
The Bristlebot moves by vibrating its bristles, creating a unique and entertaining motion. You can also decorate your Bristlebot with craft materials to give it a personal touch. This project is a great way to learn about basic circuitry and simple mechanical systems.
2. A Rolling Robot
If you’re looking for a slightly more challenging project, you can build a rolling robot. This type of robot requires more materials and effort, but it’s a great way to learn about mechanics and engineering. Here’s what you’ll need:
Materials:
- Motor
- Wheels
- Chassis (can be made from cardboard or other materials)
- Battery pack
- Switch
- Wires
- Screws or adhesive
Instructions:
- Start by assembling the chassis of your robot. You can use cardboard or other materials to create a sturdy base.
- Attach the motor to the chassis using screws or adhesive. Make sure it’s securely fastened.
- Connect the wheels to the motor shaft. You may need to use additional components like gears or pulleys to achieve the desired motion.
- Install the battery pack and switch on the chassis. Connect the motor to the battery pack using wires.
- Test your robot by turning on the switch. If everything is connected correctly, your robot should start rolling!
This project allows you to explore the principles of motion and mechanics. You can experiment with different wheel sizes, gear ratios, and chassis designs to create a robot that moves in unique ways. It’s a great opportunity to unleash your creativity and problem-solving skills.
3. A Rowing-Boat Robot
If you’re interested in building a robot that can move on water, a rowing-boat robot is a great option. This robot is made out of a DC motor and two batteries, and it can float and move on water. Here’s how you can build your own rowing-boat robot:
Materials:
- DC motor
- Batteries
- Boat-shaped base (can be made from foam or other buoyant materials)
- Propeller or paddle
- Wires
- Switch
Instructions:
- Start by attaching the DC motor to the boat-shaped base. Make sure it’s securely fastened.
- Connect the motor to the batteries using wires. Make sure the positive and negative terminals are properly connected.
- Attach a propeller or paddle to the motor shaft. This will create the motion that propels the boat.
- Install a switch on the boat to control the motor. This will allow you to turn the robot on and off.
- Place your rowing-boat robot in water and turn on the switch. Watch as it moves across the water!
This project combines elements of mechanics and buoyancy. It’s a great way to learn about the principles of water propulsion and experiment with different designs. You can also add additional features like a rudder or a steering mechanism to make your rowing-boat robot even more versatile.
4. mBot: a STEM Coding Robot
If you’re interested in coding and robotics, the mBot is a great option. It’s a STEM education robot that offers great flexibility in shapes and compatibility with LEGO bricks. The mBot is supported by the Makeblock App, which allows you to control and program the robot. Here are some key features of the mBot:
-
Easy assembly: The mBot comes with step-by-step instructions for easy assembly. You don’t need any specialized tools or knowledge to put it together.
-
Programmable: The mBot can be programmed using block-based coding or Arduino programming. This allows you to explore different coding concepts and create your own robot behaviors.
-
Sensors and modules: The mBot comes with various sensors and modules, including line-following sensors, ultrasonic sensors, and LED lights. This allows you to create interactive and responsive robot projects.
-
Compatibility with LEGO bricks: The mBot is compatible with LEGO bricks, which means you can combine it with your existing LEGO sets to create even more complex robot designs.
The mBot is a versatile and educational robot that can be used by beginners and experienced robotics enthusiasts alike. It’s a great tool for learning about robotic machinery, electronic parts, block-based programming, and developing logical thinking and design skills. CHECK PRICE on: Amazon | Walmart | eBay | Etsy
5. Robot Kits for Beginners
If you’re a beginner and want to start building robots without the hassle of sourcing individual components, robot kits are a great option. Robot kits come with all the necessary parts and step-by-step instructions to build your own robot. Here are some popular robot kits for beginners:
-
LEGO Mindstorms: LEGO Mindstorms is a popular robot kit that allows you to build and program your own robots using LEGO bricks. It’s a great option for kids and adults who want to learn about robotics in a fun and interactive way.
-
Arduino Starter Kit: The Arduino Starter Kit is a comprehensive kit that includes an Arduino board, sensors, motors, and other components. It comes with a detailed guidebook that walks you through various projects, from simple to more complex.
-
Raspberry Pi Robot Kit: The Raspberry Pi Robot Kit combines the power of the Raspberry Pi computer with robotics. It allows you to build and program your own robot using the versatile Raspberry Pi platform.
-
Makeblock Starter Robot Kit: The Makeblock Starter Robot Kit is designed for beginners who want to learn about robotics and programming. It comes with a variety of sensors, motors, and other components, and can be programmed using block-based coding or Arduino programming.
Robot kits are a great way to get started with robotics. They provide a structured learning experience and allow you to build and program your own robots without the need for advanced technical skills.
6. Robot Building with Household Items
You don’t always need specialized components to build a robot. In fact, you can create simple robots using everyday household items. Here are some examples:
-
Brushbot: Similar to the Bristlebot, a brushbot is made using a toothbrush, a small motor, and batteries. By attaching the motor to the toothbrush head and adding a small weight to the bristles, you can create a robot that moves around in a random pattern.
-
Tin Can Robot: A tin can robot is made using an empty tin can, a motor, batteries, and some basic craft materials. By attaching the motor to the can and adding wheels, you can create a robot that rolls around.
-
Artbot: An artbot is made using a marker, a motor, batteries, and some basic craft materials. By attaching the motor to the marker and adding a switch, you can create a robot that creates unique drawings.
Building robots with household items is a great way to spark creativity and resourcefulness. It allows you to repurpose everyday objects and turn them into functional robots. Plus, it’s a budget-friendly option for those who don’t want to invest in specialized components.
7. Paper Robots
If you’re looking for a low-cost and eco-friendly option, paper robots are a great choice. Paper robots are made using printable templates that can be cut, folded, and assembled into 3D models. Here’s how you can make your own paper robot:
Materials:
- Printable template
- Scissors
- Glue or tape
Instructions:
- Start by printing out the paper robot template. You can find a variety of templates online, ranging from simple to more complex designs.
- Carefully cut out the template along the edges.
- Fold along the indicated lines to create the 3D shape of the robot.
- Use glue or tape to secure the edges and hold the robot together.
- Once the glue or tape has dried, your paper robot is ready to be displayed or played with.
Paper robots are a great way to combine creativity and engineering. You can experiment with different designs, colors, and materials to create unique and personalized robots. Plus, they make great decorations or gifts for friends and family.
8. Robot Programming
Once you’ve built your robot, you can take your project to the next level by programming it. Programming allows you to control the behavior of your robot and make it perform specific tasks. Here are some popular programming platforms for robot programming:
-
Scratch: Scratch is a block-based programming language developed by MIT. It’s designed for beginners and allows you to create interactive stories, games, and animations. Scratch is a great option for programming simple robots like the Bristlebot or the mBot.
-
Arduino: Arduino is an open-source electronics platform that allows you to create interactive projects. It’s widely used in the robotics community and provides a flexible and powerful programming environment. Arduino is a great option for programming more complex robots that require advanced control and functionality.
-
Python: Python is a popular programming language that’s widely used in various fields, including robotics. It’s known for its simplicity and readability, making it a great choice for beginners. Python is a versatile language that can be used to program a wide range of robots, from simple to more complex.
When programming your robot, start with simple tasks and gradually increase the complexity. This will help you build your programming skills and understand the capabilities of your robot. Don’t be afraid to experiment and try new things. Programming is a creative process that allows you to bring your robot to life.
FAQ

What is the easiest robot to make?
The easiest robot to make depends on your level of experience and the resources available to you. If you’re a beginner, the Bristlebot is a great option. It requires minimal materials and can be built in just a few minutes. The Bristlebot is a simple vibrating robot that moves around in a random pattern.
How to build a robot for beginners?
Building a robot for beginners can be a fun and educational experience. Here are some steps to get you started:
-
Choose a simple robot project: Start with a project that doesn’t require advanced skills or expensive materials. The Bristlebot or a paper robot are great options for beginners.
-
Gather the necessary materials: Depending on the project, you’ll need different materials. Make sure to gather all the necessary components before you start.
-
Follow step-by-step instructions: Whether you’re using a kit or building from scratch, it’s important to follow step-by-step instructions carefully. This will ensure that your robot is built correctly and functions as intended.
-
Experiment and learn: Building robots is a learning process. Don’t be afraid to experiment and try new things. Embrace the challenges and learn from your mistakes.
Read more about “… How to Design a Robot for Beginners: A Comprehensive Guide”
How to make a robot with a box easy?
Making a robot with a box is a fun and easy project. Here’s how you can do it:
-
Find a sturdy box: Start by finding a box that’s large enough to accommodate the components of your robot. It should be sturdy enough to hold the weight of the robot.
-
Gather the necessary materials: Depending on the type of robot you want to build, you’ll need different materials. This can include motors, wheels, sensors, and other electronic components.
-
Cut holes in the box: Use a utility knife or scissors to cut holes in the box for the components. Make sure the holes are the right size and in the right position.
-
Attach the components: Use adhesive or screws to attach the components to the box. Make sure they’re securely fastened and properly connected.
-
Test your robot: Once you’ve assembled the robot, test it to make sure everything is working correctly. Make any necessary adjustments or modifications.
Making a robot with a box is a great way to repurpose materials and unleash your creativity. It’s a budget-friendly option that allows you to create unique and personalized robots.
Read more about “How to Make a Robot with Cardboard (Very Easy) …”
How to make a robot out of paper?
Making a robot out of paper is a fun and eco-friendly project. Here’s how you can do it:
-
Find a printable template: Start by finding a printable template for a paper robot. There are many templates available online, ranging from simple to more complex designs.
-
Print and cut out the template: Print out the template and carefully cut along the edges. Make sure to follow the instructions provided with the template.
-
Fold and assemble the robot: Fold along the indicated lines to create the 3D shape of the robot. Use glue or tape to secure the edges and hold the robot together.
-
Decorate your robot: Once the glue or tape has dried, you can decorate your paper robot using markers, colored pencils, or other craft materials. Let your creativity shine!
Making a robot out of paper is a great way to combine art and engineering. It’s a low-cost and eco-friendly option that allows you to create unique and personalized robots.
Read more about “How to Make a Robot for School Project Easy? …”
Conclusion
Building a simple robot can be a fun and educational experience. Whether you choose to build a Bristlebot, a rolling robot, a rowing-boat robot, or explore other options like the mBot or paper robots, the process of building and programming a robot will help you develop valuable skills in engineering, electronics, and programming.
Remember to start with a simple project that matches your skill level and gather all the necessary materials before you begin. Follow step-by-step instructions carefully and don’t be afraid to experiment and learn from your mistakes. Building robots is a creative process that allows you to unleash your imagination and problem-solving skills.
If you’re looking for more information on robotics and related topics, check out the following articles on Robot Instructions™:
For more information on specific robot products mentioned in this article, check out the following links:
Remember, building a robot is not just about the end result, but also about the journey. Embrace the challenges, have fun, and enjoy the process of creating your own robot!
Recommended Links
- Robotic Applications in Home Cleaning
- Robotics Engineering
- Robotics
- Robots in Agriculture
- 2023 The Ultimate Guide to Litter-Robot: The Future of Cat Litter Boxes
If you’re interested in learning more about robotics and related topics, check out these recommended links. They provide valuable information and resources to help you explore the world of robotics further.
Reference Links
For more information on how kids can make robots at home, check out the article How Can Kids Make Robots at Home. You can also visit the official website of Makeblock for more information on their products and resources.
Remember to always have fun and keep exploring the exciting world of robotics!