Support our educational content for free when you purchase through links on our site. Learn more
🤖 What Do I Need to Know to Build a Robot? (2026 Guide)

To build a robot, you need three things: a clear purpose, a power source that won’t quit, and the patience to debug code that refuses to run. If you are asking yourself, “What do I need to know to build a robot?“, the answer isn’t a degree in engineering; it’s a willingness to start small, fail fast, and iterate until the wheels finally turn.
Most beginners get stuck trying to build a humanoid masterpiece on day one. We once spent three weeks debugging a “simple” line-follower robot only to realize we had wired the motor driver backwards. It was a humbling lesson in checking the basics before chasing complexity.
Did you know the first programmable robot, Unimate, weighed over 1,0 pounds and was used to lift hot metal in a General Motors plant? Today, you can build a robot that fits in your hand with a budget of under $50. The barrier to entry has never been lower, but the learning curve is still real.
Key Takeaways
- Define Your Goal First: Don’t buy parts until you know exactly what your robot needs to do, whether it’s following a line or avoiding obstacles.
- Power is Critical: A robot is useless without a stable voltage and sufficient current; always calculate your battery needs before assembly.
- Start with the Basics: Master an Arduino or Raspberry Pi and simple sensors before attempting complex AI or autonomous navigation.
- Embrace Failure: Your first prototype will fail; use troubleshooting and iteration as your primary learning tools.
Table of Contents
- ⚡️ Quick Tips and Facts
- 🤖 A Brief History of Robotics: From Automata to AI
- 🧠 1. Defining Your Robot’s Purpose and Capabilities
- 🛠️ 2. Essential Tools and Materials for Robot Construction
- 🔌 3. Selecting the Right Microcontroller and Sensors
- 🔋 4. Power Systems and Battery Management Strategies
- 🦾 5. Mechanical Design: Chassis, Actuators, and Kinematics
- 💻 6. Programming Your Robot: Languages, Frameworks, and Logic
- 🧪 7. Building Protypes and Troubleshooting Common Errors
- 👥 8. Collaborative Workflows for Team-Based Robotics Projects
- 🏠 9. DIY Robotics: How to Make a Robot With Home Materials
- 🎓 10. Programming Your Robot for Kids and Beginners
- 🚀 1. Advanced Integration: AI, Computer Vision, and IoT
- 💡 Quick Tips and Facts
- Conclusion
- Recommended Links
- FAQ
- Reference Links
⚡️ Quick Tips and Facts
Before you solder your first joint or write a single line of code, let’s hit the pause button and drop some hard truths that even seasoned engineers at Robot Instructions™ wish they knew on day one.
- The “First Prototype” Myth: Your first robot will not work perfectly. In fact, if it does, you probably didn’t build it yourself! The goal of the first build is to fail fast and learn faster.
- Power is King: You can have the smartest code and the strongest chassis, but if your battery voltage sags under load, your robot is just a very expensive paperweight. Always calculate your current draw before buying a battery.
- Servos vs. DC Motors: Confused? Here’s the cheat sheet: DC Motors spin continuously (great for wheels), while Servos hold a specific angle (great for arms and joints). Don’t try to use a servo to drive a tank tread; it’ll burn out in seconds.
- The “Deadband” Reality: As mentioned in our featured video tutorial, mechanical systems have “slop.” If you don’t program a deadband (a zone where small inputs are ignored), your robot will jitter uncontrollably when trying to stand still.
- Code Before Hardware: You don’t need the physical robot to start writing code. Simulate your logic first! This saves hours of debugging.
Did you know? The word “robot” was first coined in 1920 by Czech writer Karel Čapek in his play R.U.R. (Rosum’s Universal Robots), derived from the Czech word robota, meaning “forced labor” or “drudgery.” It wasn’t until the 1950s that George Devol and Joseph Engelberger built the first industrial robot, Unimate, which moved hot metal die castings.
If you’re wondering how to bridge the gap between “I want a robot” and “I have a robot,” you’re in the right place. We’ve been there, burnt our fingers, and fried our microcontrollers so you don’t have to. Let’s get building.
🤖 A Brief History of Robotics: From Automata to AI

To understand where we are going, we have to look at where we’ve been. Robotics isn’t just a modern tech buzzword; it’s the culmination of centuries of human ingenuity.
The Age of Automata
Long before silicon chips, humans were obsessed with creating moving machines. In ancient Greece, Archytas is credited with building a steam-powered pigeon, and in the 3rd century BCE, Hero of Alexandria created complex automata driven by water and steam. These weren’t “intelligent,” but they were the ancestors of the actuators we use today.
The Industrial Revolution
Fast forward to the 20th century. The invention of the programmable controller changed everything. In 1954, George Devol patented the first programmable robot, which led to the creation of Unimate by Joseph Engelberger. This beast of a machine didn’t have AI; it just repeated a sequence of movements. But it proved that machines could do dangerous, repetitive tasks better than humans.
The Rise of AI and Autonomy
Today, we are in the era of Autonomous Robots. Thanks to advancements in Machine Learning and Computer Vision, robots can now navigate unknown environments, recognize objects, and make decisions. From the Romba vacuuming your floor to the Boston Dynamics Atlas doing parkour, the line between tool and teammate is blurring.
Pro Tip: If you want to dive deeper into the ethical implications of these advancements, check out our guide on Robot Ethics and Safety.
🧠 1. Defining Your Robot’s Purpose and Capabilities
Before you buy a single screw, you need to answer the million-dollar question: What is your robot supposed to do?
Many beginners make the mistake of building a robot that tries to do everything and ends up doing nothing well. As Rabia Aslam, a Firmware Engineer at Sphero, notes, “Helping kids get started on a robot project should begin with setting goals for the project. Determing the cost and time involved should follow that goal-setting.”
Step 1: Choose Your Archetype
- Mobile Robots: These move around. Think wheled rovers, leged walkers, or flying drones.
Challenge: Navigation and obstacle avoidance. - Manipulator Robots: These have arms. Think robotic arms used in factories or 3D printers.
Challenge: Precision and kinematics. - Stationary Robots: These stay put but interact. Think smart home assistants or automated pet feeders.
Challenge: Sensor integration and user interface.
Step 2: Define the “Must-Haves”
Create a list of non-negotiable features.
- Does it need to avoid obstacles? (Requires Ultrasonic or LiDAR sensors)
- Does it need to follow a line? (Requires IR sensors)
- Does it need to pick up objects? (Requires Servos and Grippers)
Step 3: Assess Your Constraints
Be honest about your budget and timeline.
- Beginer/Student: Stick to kits like Sphero RVR or Lego Mindstorms (legacy) or Makeblock.
- Advanced/Team: Go custom with 3D printed parts and Raspberry Pi brains.
Curiosity Check: You might think a complex robot needs a complex brain. But sometimes, a simple Arduino can do the heavy lifting if the logic is sound. We’ll reveal how to choose the right “brain” in the next section.
🛠️ 2. Essential Tools and Materials for Robot Construction
You don’t need a million-dollar lab to build a robot. As Bryce Gaston, an Electrical Engineer at Sphero, puts it, “You do not need any sophisticated tools for building a robot, just a set of screwdrivers, a laptop running your favorite operating system, and a development processor board.”
However, having the right tools makes the difference between a weekend project and a multi-year headache.
The “Must-Have” Toolkit
| Tool | Why You Need It | Pro Tip |
|---|---|---|
| Soldering Iron | To connect wires permanently. | Get one with adjustable temperature (30°C – 40°C). |
| Multimeter | To check voltage, current, and continuity. | Essential for debugging power issues. |
| Wire Strippers | To prepare wires without damaging them. | Don’t use your teeth! |
| Hot Glue Gun | For quick, temporary fixes. | Use Epoxy or CA Glue for permanent bonds. |
| Hex Drivers | For tightening screws on motors and chassis. | A set of metric sizes is best. |
| Breadboard & Jumper Wires | For protyping circuits without soldering. | Great for testing sensor logic. |
Construction Materials
- Low-Tech: Cardboard, popsicle sticks, and duct tape. Perfect for protyping chassis shapes.
- Mid-Tech: Acrylic sheets, aluminum angles, and 3D printed parts.
- High-Tech: Carbon fiber, custom PCBs, and laser-cut steel.
Where to Buy Parts
You can find components at specialized electronics retailers or general marketplaces.
- Adafruit Industries: Great for sensors and breakout boards.
- SparkFun Electronics: Excellent tutorials and components.
- RobotShop: A one-stop shop for kits and parts.
- Amazon: Good for generic motors, wires, and chassis.
👉 Shop
- Adafruit: Search on Amazon | Adafruit Official
- SparkFun: Search on Amazon | SparkFun Official
- RobotShop: Search on Amazon | RobotShop Official
🔌 3. Selecting the Right Microcontroller and Sensors
This is where the magic happens. The Microcontroller is the brain, and the Sensors are the eyes and ears.
Choosing the Brain
- Arduino (Uno/Nano): The gold standard for beginners. It’s cheap, reliable, and has a massive community. Perfect for controlling motors and reading simple sensors.
Best for: Simple logic, motor control, sensor reading. - Raspberry Pi: A full computer in a credit card size. It runs Linux, can process video, and handle complex AI.
Best for: Computer vision, Wi-Fi connectivity, complex decision making. - ESP32: A powerful microcontroller with built-in Wi-Fi and Bluetooth.
Best for: IoT projects and wireless control.
Video Insight: In our featured video tutorial, the creator emphasizes that the Arduino Uno is “cheap, reliable, invincible.” They also stress the importance of checking hardware compatibility before coding.
Essential Sensors
| Sensor Type | Function | Common Use Case |
|---|---|---|
| Ultrasonic (HC-SR04) | Measures distance using sound waves. | Obstacle avoidance. |
| IR (Infrared) | Detects reflected light. | Line following, proximity. |
| IMU (Accelerometer/Gyro) | Measures orientation and acceleration. | Balancing robots, drones. |
| Camera (USB/CSI) | Captures visual data. | Object recognition, navigation. |
| Encoders | Measures motor rotation speed/position. | Precise movement control. |
👉 CHECK PRICE on:
- Arduino Uno: Search on Amazon | Arduino Official
- Raspberry Pi 4/5: Search on Amazon | Raspberry Pi Official
- Ultrasonic Sensors: Search on Amazon
🔋 4. Power Systems and Battery Management Strategies
Power is the lifeblood of your robot. A weak battery can cause your microcontroller to reset randomly, or worse, damage your components.
Understanding Voltage and Current
- Voltage (V): The “pressure” pushing electricity. Most logic boards run on 5V or 3.3V.
- Current (A): The “flow” of electricity. Motors can draw huge spikes of current when they start moving.
Battery Types
- AA/AAA Batteries: Good for low-power projects. Easy to find, but limited capacity.
- LiPo (Lithium Polymer): The standard for robotics. High energy density, lightweight, but dangerous if punctured or overcharged.
Warning: Always use a dedicated LiPo charger and never leave them charging unattended. - Li-ion (18650): Similar to LiPo but safer and often used in power tools.
Voltage Regulation
Most motors run on 6V-12V, but your Arduino runs on 5V. You need a Voltage Regulator or Buck Converter to step down the voltage.
- Pro Tip: As noted in our featured video, “If you regulate down to 5v, you should not power through the barrel plug. I should have gone directly to the barrel from the bat.” Direct connections reduce voltage drop.
👉 Shop
- LiPo Batteries: Search on Amazon
- Buck Converters: Search on Amazon
🦾 5. Mechanical Design: Chassis, Actuators, and Kinematics
Now let’s talk about the body. A robot with a weak chassis is like a Ferrari with a cardboard body—it won’t go anywhere fast.
Chassis Options
- Kit Chassis: Pre-cut acrylic or metal frames. Easy to assemble, but limited customization.
- 3D Printed: Fully customizable. You can design exactly what you need using software like Fusion 360 or Tinkercad.
- DIY: Cardboard, wood, or PVC pipes. Great for protyping.
Actuators (The Muscles)
- DC Motors: Continuous rotation. Need a Motor Driver (like the L298N or MX1508) to control direction and speed.
- Servos: Precise angle control. Great for arms and steering.
- Stepper Motors: High precision, used in 3D printers and CNC machines.
Kinematics
This is the math of movement.
- Differential Drive: Two wheels, independent control. The robot turns by spinning wheels at different speeds. Simple and effective.
- Ackermann Steering: Like a car. Front wheels turn, rear wheels drive. Better for high-speed stability.
- Omni-Wheels: Wheels with rollers that allow movement in any direction. Great for agility.
Did you know? The TurtleBot series, widely used in research, uses a differential drive system. It’s the “Hello World” of mobile robotics.
💻 6. Programming Your Robot: Languages, Frameworks, and Logic
You have the hardware; now you need the software. This is where you tell your robot what to do.
Languages
- C/C++: The native language of Arduino. Fast, efficient, but has a steeper learning curve.
- Python: The language of AI and Raspberry Pi. Easy to read, powerful libraries for vision and machine learning.
- Block-Based Coding: Great for kids. Tools like Scratch or MakeCode let you drag and drop logic blocks.
Frameworks
- ROS (Robot Operating System): The industry standard for advanced robotics. It’s a middleware that helps different parts of the robot talk to each other.
- Arduino IDE: The standard environment for writing and uploading code to Arduino boards.
Basic Logic Flow
- Initialize: Set up pins, start serial communication.
- Read Sensors: Get data from the environment.
- Process: Make a decision based on the data (e.g., “If distance < 10cm, stop”).
- Act: Send commands to motors or servos.
- Loop: Repeat forever.
Curiosity Check: You might think you need to be a math genius to program a robot. But with PID control (Proportional-Integral-Derivative), you can make a robot balance or follow a line with just a few lines of code. We’ll explain how in the next section.
🧪 7. Building Protypes and Troubleshooting Common Errors
The first time you power up your robot, it might not work. And that’s okay! Protyping is an iterative process.
The Iteration Cycle
- Build: Assemble the components.
- Test: Run a simple script.
- Fail: Something breaks or doesn’t work.
- Analyze: Why did it fail? (Lose wire? Wrong code? Weak battery?)
- Fix: Make a change.
- Repeat.
Common Errors and Fixes
- Motor doesn’t spin: Check the Motor Driver wiring. Is the enable pin high? Is the battery voltage sufficient?
- Microcontroller resets: Your power supply is saging. Add a capacitor or use a better battery.
- Robot jitters: You need a deadband in your code to ignore small sensor noise.
- Code won’t upload: Check the Baud Rate and the correct Board selection in the IDE.
Expert Advice: “Always look at example code of hardware you are using. It saves a lot of time!” This is a golden rule from our featured video. Don’t reinvent the wheel; use the libraries provided by the manufacturer.
👥 8. Collaborative Workflows for Team-Based Robotics Projects
If you’re working with a team, communication is just as important as code.
Dividing the Labor
- Mechanical Team: Designs the chassis, selects motors, and handles assembly.
- Electrical Team: Manages wiring, power distribution, and sensor integration.
- Software Team: Writes the code, handles logic, and integrates AI.
Concurrent Workflows
Don’t wait for the hardware to be finished before writing code.
- Simulation: Use tools like Gazebo to simulate the robot’s behavior.
- Mock-ups: Build a cardboard version to test the code logic.
- Version Control: Use Git to manage code changes. It prevents the “I overwrote your file” disaster.
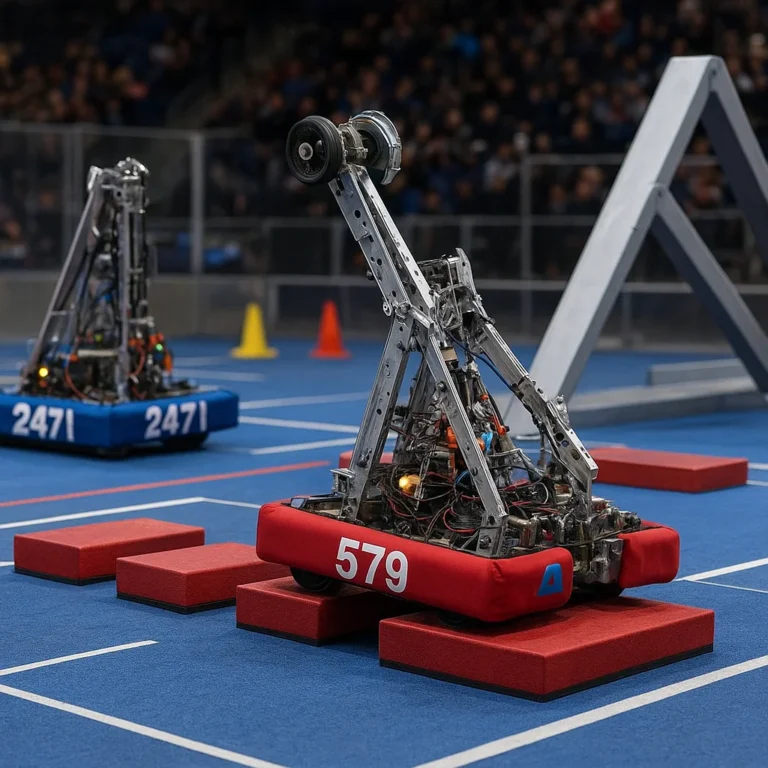
Real World Example: In the FIRST Robotics Competition, teams of students work in parallel. The mechanical team builds the robot while the software team codes on a simulator. They integrate everything in the final days.
🏠 9. DIY Robotics: How to Make a Robot With Home Materials
You don’t need to spend a fortune. You can build a surprisingly capable robot with stuff you already have.
The “Cardboard Bot”
- Chassis: A sturdy cardboard box.
- Wheels: Bottle caps or old CD-ROMs.
- Motors: Salvaged from old toys or cheap DC motors from a hobby store.
- Power: A 9V battery or a pack of AA batteries.
- Brain: An Arduino Nano (the only thing you might need to buy).
The “Sphero Craft Pack” Approach
If you have a Sphero robot, you can use the Craft Pack to build custom chassis around it. It’s a great way to learn mechanical design without soldering.
Fun Fact: The Hebocon competition in Tokyo challenges builders to create the “worst” robots possible. It’s a celebration of DIY spirit and creativity, proving that you don’t need perfection to have fun.
🎓 10. Programming Your Robot for Kids and Beginners
Robotics is a fantastic way to get kids interested in STEM. And the best part? You can start as young as four years old.
Visual Coding
- Scratch: Drag-and-drop blocks. Perfect for understanding loops and conditionals.
- MakeCode: Used with Micro:bit and LEGO.
- Sphero Edu: An app that lets kids code Sphero robots with blocks, flowcharts, or JavaScript.
The “Microwave Analogy”
Programming is like using a microwave. You set the time (input), push start (execute), and the food cooks (output). If you set it wrong, nothing happens or it burns. That’s debugging!
Recommended Kits for Kids
- Dash & Dot: Fun, colorful robots that teach coding basics.
- Cubelets: Modular robots that snap together. Each block has a function (sense, think, act).
- Lego Spike Prime: The successor to Mindstorms, with a focus on engineering and coding.
👉 Shop
- Sphero: Search on Amazon | Sphero Official
- Lego Spike Prime: Search on Amazon | Lego Education
- Makeblock: Search on Amazon | Makeblock Official
🚀 1. Advanced Integration: AI, Computer Vision, and IoT
Once you’ve mastered the basics, it’s time to level up.
Computer Vision
Using a camera and OpenCV (a library for computer vision), your robot can:
- Recognize faces.
- Follow a specific color.
- Navigate using visual landmarks.
Machine Learning
Train your robot to recognize patterns.
- TensorFlow Lite: Run ML models on a Raspberry Pi.
- Teachable Machine: A Google tool to train models without coding.
IoT (Internet of Things)
Connect your robot to the internet.
- Control it from your phone.
- Send data to the cloud for analysis.
- Integrate with smart home devices.
Did you know? The TurtleBot 4 runs ROS 2 and is used by top research labs globally. It’s the bridge between hobbyist projects and professional research.
Conclusion

Building a robot is a journey of trial, error, and triumph. Whether you’re a kid with a cardboard box or a seasoned engineer with a 3D printer, the process is the same: Define, Build, Code, Test, Iterate.
We started by asking, “What do I need to know to build a robot?” The answer isn’t a single tool or a specific code snippet. It’s a mindset. It’s the willingness to fail, the curiosity to understand how things work, and the creativity to solve problems.
Our Top Recommendations:
- Start Simple: Don’t build a humanoid robot on day one. Build a line-follower or an obstacle-avoider.
- Invest in Power: A good battery and voltage regulator will save you hours of frustration.
- Join a Community: Whether it’s Hackaday, StackExchange, or a local FIRST team, you’ll learn faster with help.
- Embrace the Mess: Your first prototype will be ugly. That’s a badge of honor.
If you’re ready to take the plunge, grab an Arduino, some wires, and a motor. The world of robotics is waiting for you. And remember, the best way to learn is to just start experimenting and tinkering.
Recommended Links
Essential Kits and Components
- Arduino Starter Kit: Search on Amazon | Arduino Official
- Raspberry Pi 4 Kit: Search on Amazon | Raspberry Pi Official
- Sphero RVR: Search on Amazon | Sphero Official
- Lego Spike Prime: Search on Amazon | Lego Education
Books for Further Learning
- Make: Robotics: Search on Amazon
- Programming Robots with ROS: Search on Amazon
- Robotics, Vision and Control: Search on Amazon
FAQ

How do I troubleshoot common problems when building a robot?
Troubleshooting starts with isolation. If your robot isn’t moving, check the power first. Use a multimeter to ensure the battery is delivering the correct voltage. If the power is good, check the motor connections. If the motors spin but the robot doesn’t move, check the wheels or the chassis friction. If the code isn’t running, check the serial monitor for error messages. Always start with the simplest explanation: a loose wire or a dead battery.
Read more about “🤖 15 Best Robot Educational Kits for Kids (2026)”
What types of sensors are essential for building a robot?
It depends on your robot’s purpose. For a basic mobile robot, an Ultrasonic sensor (HC-SR04) is essential for obstacle avoidance. For a line follower, IR sensors are a must. If you want your robot to balance, you need an IMU (Inertial Measurement Unit). For advanced navigation, a Camera or LiDAR is required. Start with one or two and expand as your project grows.
Read more about “🤖 15 Top Robot Marketplaces for Automation (2026)”
How can I design a robot that can navigate its environment?
Navigation requires a combination of sensors and algorithms. You’ll need Odometry (tracking wheel rotation) to estimate position, and Sensors (Ultrasonic, LiDAR, or Camera) to detect obstacles. For complex environments, you’ll need SLAM (Simultaneous Localization and Mapping) algorithms, often implemented using ROS. Start with simple behaviors like “move forward until obstacle, then turn” before attempting full autonomy.
Read more about “🤖 The Ultimate Robot Diagnostics Guide (2026): 10 Steps to Fix Any Glitch”
What skills do I need to learn to build a functional robot?
You don’t need to be an expert in everything.
- Basic Electronics: Understanding voltage, current, and circuits.
- Programming: C++ for Arduino, Python for Raspberry Pi.
- Mechanical Design: Basic understanding of gears, motors, and materials.
- Problem Solving: The ability to debug and iterate.
You can learn these skills through online courses, YouTube tutorials, and hands-on projects.
Read more about “🛑 15 Essential Robot Safety Instructions for 2026”
What are the basic components required to build a robot?
Every robot needs four main components:
- Power Source: Battery or power supply.
- Brain: Microcontroller (Arduino, Raspberry Pi).
- Actuators: Motors or servos to create movement.
- Sensors: To perceive the environment.
Plus, a Chassis to hold it all together and Wiring to connect everything.
Read more about “🤖 Master Robot Control System Documentation: The 7-Step Blueprint (2026)”
What are the basic components to build a robot?
(See above). The core components are Power, Brain, Actuators, Sensors, and Chassis.
Read more about “🤖 The Ultimate Robot Distributor Directory Guide (2026)”
What to consider when building a robot?
Consider the purpose of the robot, the budget, the timeline, and your skill level. Don’t overcomplicate your first project. Also, consider the power requirements and the weight of the components. A heavy robot needs stronger motors and a bigger battery.
Read more about “🏆 5 Best Robot Vacums of 2026: Flagship Performance, Mid-Range Prices”
What is required for robot design?
Robot design requires a blend of mechanical engineering (chassis, kinematics), electrical engineering (circuits, power), and software engineering (control logic, AI). You also need tools like CAD software, 3D printers, and soldering irons.
Read more about “🤖 15 Robot Patents That Rewrote the Rules (2026)”
What are the basics of designing a robot?
Start with a concept. Sketch it out. Define the requirements. Choose the components. Design the chassis. Write the code. Build a prototype. Test and iterate.
Read more about “🤖 Robot AI: The Real Future of Human-Robot Collaboration (2026)”
How to create your own robot?
- Define your goal.
- Gather components (Arduino, motors, sensors, battery).
- Assemble the chassis.
- Wire the components.
- Write the code.
- Test and debug.
- Refine and improve.
Read more about “🤖 8 Best Pool Cleaning Robots of 2026: Tested & Ranked”
What do I need to learn to build a robot?
You need to learn basic electronics, programming (C++ or Python), mechanical design, and problem-solving. Resources like Arduino tutorials, ROS documentation, and online courses on Coursera or Udemy are great places to start.
Read more about “🤖 7 Best Bathroom Cleaning Robots of 2026: The Truth About Automation”
Reference Links
- Sphero: How to Build a Robot
- Robotics Guide: How to Get Started in Robotics
- Arduino: Official Documentation
- Raspberry Pi: Official Documentation
- IEEE Robotics & Automation Society: RAS Publications
- ROS (Robot Operating System): ROS Wiki
- Adafruit: Learning System
- SparkFun: Tutorials
- FIRST Robotics: Competition Info
- VEX Robotics: Competition Info
- Boston Dynamics: Atlas Robot
- Clearpath Robotics: TurtleBot 4
- iRobot: Create 3
- Make Magazine: Robotics Projects
- Hackaday: Robotics Tag
- Instructables: Robotics Category